Jailbreak iOS 4 GM for iPhone 3Gs
Within 24 hours of apple releasing the Gold Master (final) version of iOS 4 (new name for iPhone OS 4), the hacker community, or in this case, just one guy (or gal?) has released patches to the Pwnage Tool 3.1.5 to support this new OS… and naturally I had to try it out 😉
I followed the instructions posted on redmondpie.com here: http://www.redmondpie.com/how-to-jailbreak-ios-4.0-with-pwnagetool/ which were pretty clear and precise, but due to a couple of mistakes in the instructions posted there, Cydia wasn’t working, but otherwise everything else was good and my base-band was still intact. However, after some searching around I found the problems that caused the cydia failure and tried to correct them and succeeded. Here I am posting a concise how-to for anyone interested.
Warning: This stuff might turn your beloved iPhone into an expensive paper weight if things go wrong, and this method doesn’t work on most iPhones, so please don’t attempt this if you have never done this before and haven’t heard most of the stuff stated here. In case you are going to follow these steps, please proceed only after you read thru the entire instructions.
These instructions work only on iPhone 3Gs with 5.11.07 or earlier base-band and has already been jail broken by anything other than spirit jail break!!! Also, this is only a jail break, not unlock, so don’t attempt this if you rely on a incompatible carrier’s SIM.
Now that you have been warned, I assume you are a brave soul or just curious.. either way, here’s how it goes… First, here’s the list of things you’ll need to proceed.
1. Download Pwnage Tool 3.1.5 from here or here or just Google it.
2. Download the new firmware bundle for Pwnage tool by msft.guy from here
3. Download the updated Cydia files from here (data.tar)
4. Get your iOS 4 GM build that you got at WWDC along with iTunes 9.2 beta
Now it’s best to copy all the files to a folder or some place like desktop so it’s easy to manage. Also, for item 4, if you aren’t fortunate enough to be @ WWDC, you could ask your friends online.. Google’ll do 😉
Now here’re the steps.. pay close attention to each.
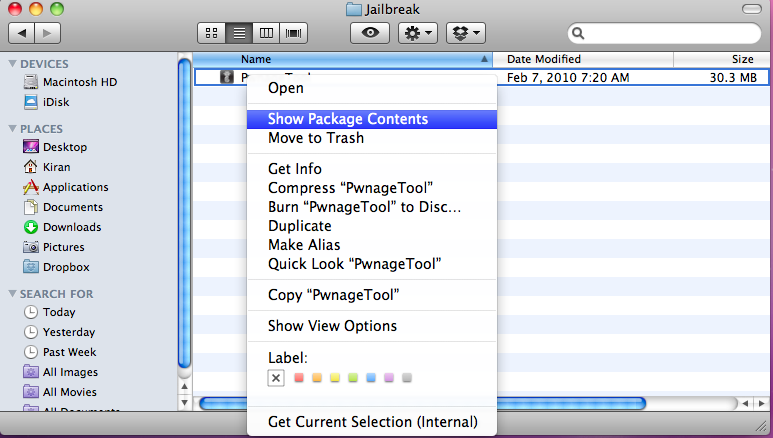
Step 1: Mount the .dmg you got from step 1 and copy the “PwnageTool” to your folder of choice or desktop (I’ll assume desktop from now on).
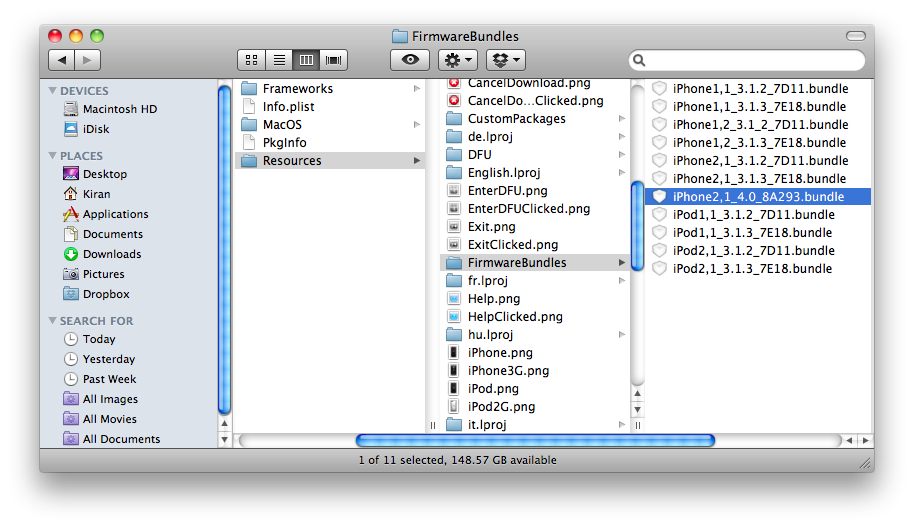
Step 2: Extract the file from item 2 and rename the file to “iPhone2,1_4.0_8A293.bundle” (renaming might not be necessary, but I did it anyway). Now right-click the PwnageTool file on desktop and choose “Show Package Contents”, then browse to “Contents\Resources\FirmwareBundles\” and place the .bundle file there.
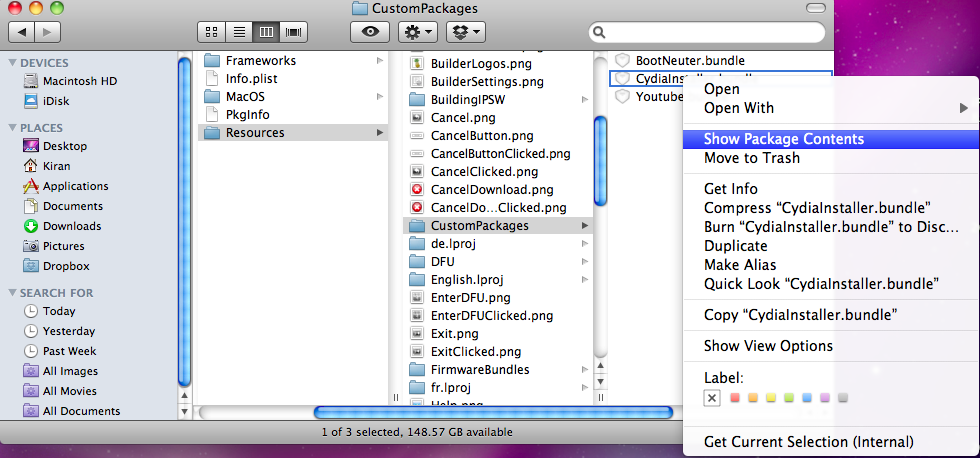
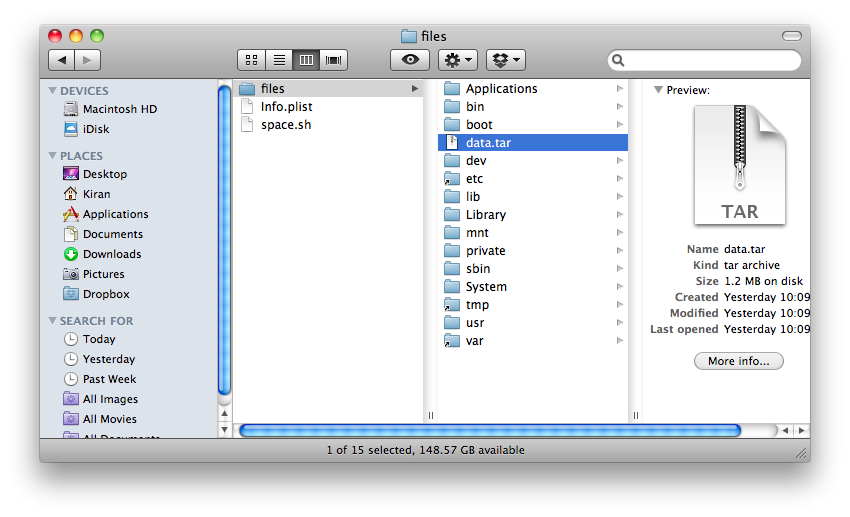
Step 3: From the same finder window, you can navigate to “Contents/Resources/CustomPackages/” then right-click CydiaInstaller.bundle and choose show package contents and browse to the “files” folder. Now copy the data.tar file (item 3) into the files folder.
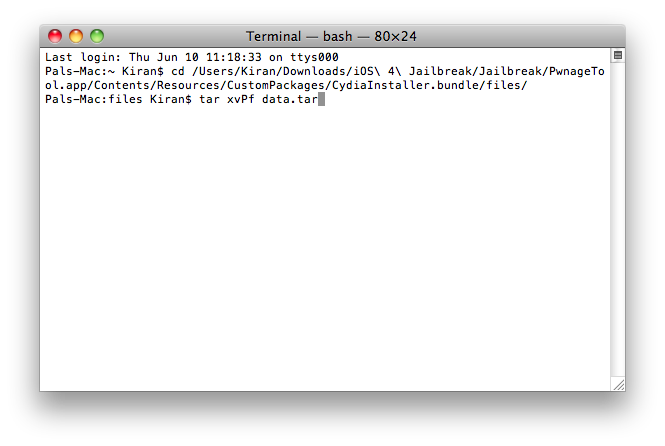
Step 4: Open a terminal window and browse to the files folder in step 3. Yoy can type “cd ” then drag the files folder into the terminal. From files folder issue the following command.. “tax xvPf data.tar”. Pay attention to the upper case ‘P’.
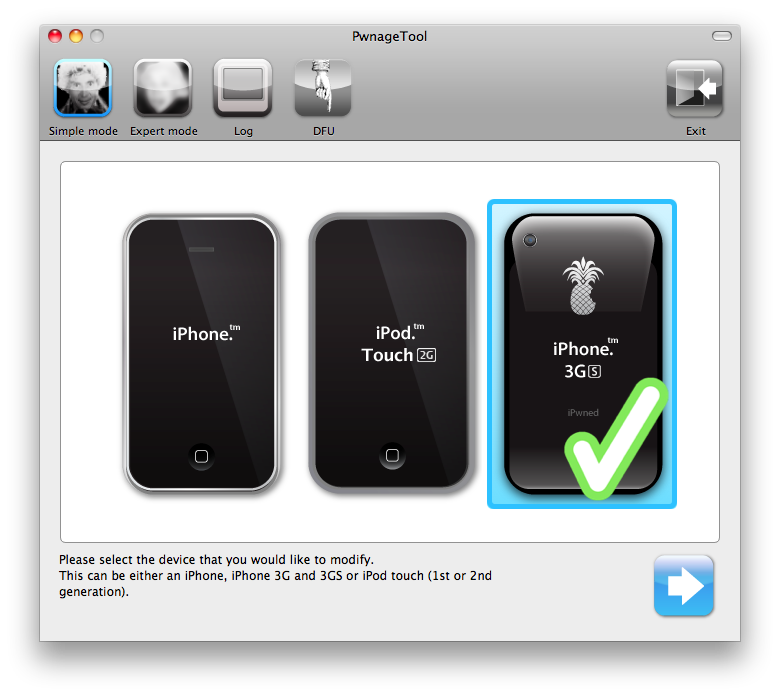
Step 5: You are almost there.. well, actually there :)… now just launch the update PwnageTool app and follow the instructions.. it’s the usual process from here.. create the custom firmware like you always do..
Step 6: Launch itunes 9.2 and use chose restore while pressing left ‘alt’ key and choose the custom firmware to restore…. that’s it. You should be good, hopefully!
The changes I made to the instructions on redmondpie.com is in step 2 and step 3. I now have iOS 4 with Cydia working, but my favorite MyWi doesn’t work and it is even crashing the SpringBoard, so I had to uninstall it. SBSettings doesn’t seem to work either. I am still playing around with it, but the os itself seems to be fast and stable.
Hope it helps someone….
Pal 🙂
